The UAC or User Control Account seems to be a very annoying feature that you and I have been encountering since we started using Windows 7. A similar topic that I discussed previously was enabling quiet hours to stop getting the app notifications.
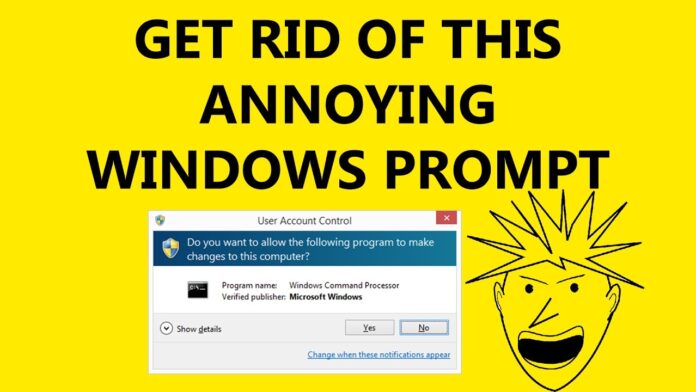
But, UAC is something totally different. Now, by default it is enabled in almost every computer. The UAC prompt asks you to enter administrator password for the computer for everything from changing the system’s settings to installing a new software. I did say annoying, but this doesn’t mean that is useless.
The UAC prompt helps protecting the changes from occurring on your computer. However, when you are setting a new PC, it may slow down the speed. Moreover, it isn’t necessary that the UAC always demands a password to proceed.
Most of the times, you only have to select “Yes” for proceeding with the action you are making, or “No” in order to discard it.
But, if you still want to disable the UAC in Windows 10, then here is a step-by-step guide with relevant images. Unfortunately, this method only works for the older version of the Windows 10 Technical Preview. With the release of Windows 10, Microsoft has totally changes as to how the UAC prompts work. Let us begin with the guide!
Disabling UAC in Windows 10 in Just five Steps
1: Right-click on the Windows button in the bottom left corner of the Desktop, and tap on “Control Panel”.
2: From the control panel, click on “User Accounts” option. You need to scroll down a bit to find this option in control panel.
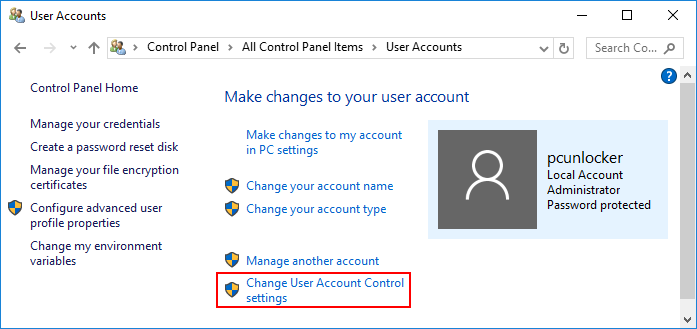
3: Inside the User Accounts, you will see a blue link saying “Change User Account Control Settings”. This is the stage where we will be making changes on the computer.

4: Click on the blue link. On the next window that pops-up, you will see a slider on the left side. Simply drag it to the bottom where it says Never Notify.
5: Once and for last, the UAC will again prompt you that changes are being made on your Windows. However, you can tap on Yes or give the administrative password for the last time.
That’s all! Now you have successfully turned off UAC. In case you wish to enable it again, simply drag the bar to an average height on the slider. I hope this guide was helpful! Don’t forget to leave your views in comments.


