The loopback adapter is quite a useful tool that was designed for testing out the network configurations. Over many years, some resourceful geeks and administrators have founded that the Loopback adapter has some handy features as well like connecting two computers without a crossover cable or connecting a virtual machine to the Internet.
Though the Loopback Adapter has a strong background, yet Microsoft seems to be hiding this feature in every new release of Windows. Before we continue to learn how to enable this feature, let me tell you why you need it.
Why You Need Loopback Adapter?
The Loopback adapter is used as a testing tool for virtual network environment when the network access isn’t available. Moreover, you also need to use it with network adapter or a network adapter driver. This feature also allows you to bind network configuration items, protocols and network clients.
If we some up the overall use of Loopback adapter, then I would say that is a multi-purpose features used for managing IPs, BGP Peer Address, router ID interfaces, etc.
I hope that now you have a better idea of Loopback adapter, so let’s continue to learn to enable this feature.
Here is a step-by-step guide with relevant images, explaining you how to enable this feature in Windows 10. You may notice that Microsoft has renamed it from “Microsoft Loopback Adapter” to “Microsoft KM-TEST Loopback Adapter”.
Enable Loopback Adapter
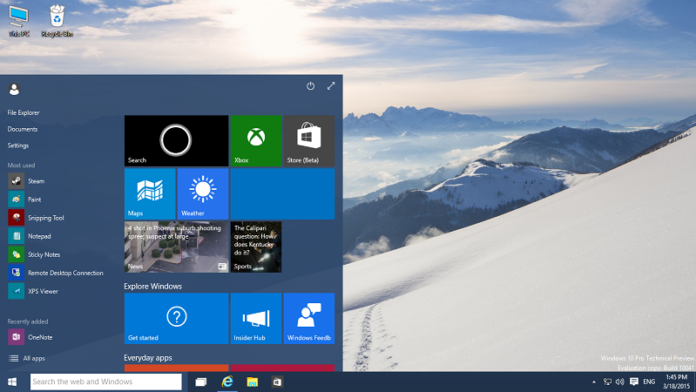
1: In the search bar, right next to the Windows icon, type “Device Manager”. From the displayed results, tap on the “Device Manager”.

2: From the device manager window, click on action, and then from the drop down box, click on “Add legacy hardware”.

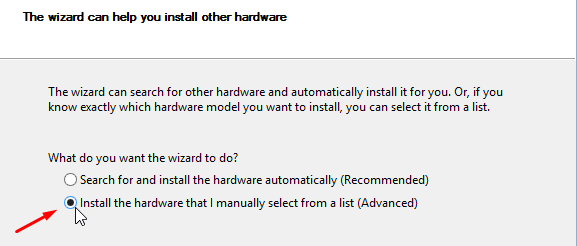
3: From the “Add Hardware” window, click on “Install the hardware that I manually select from a list (Advanced)” and after that click Next.

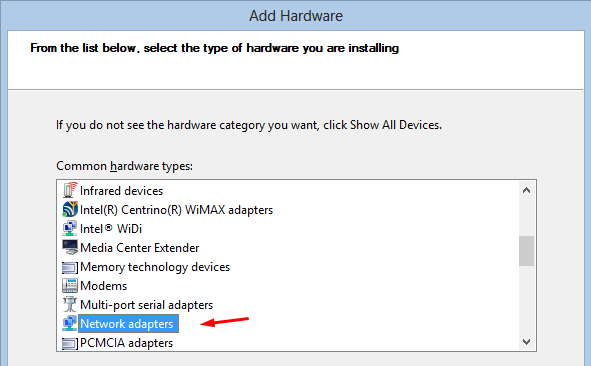
4: Now choose “Network adapters” and click Next.

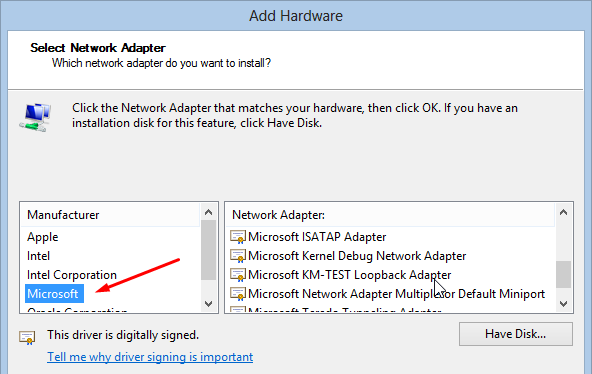
5: Navigate “Microsoft” from the left pane under the manufacturer section. Next choose Microsoft KM-TEST Loopback adapter, and click Next until it’s finished.

6: Congratulations! You have now successfully enabled the loopback adapter.
I hope the guide was useful, and you have had no issues at any point. In case there is a hurdle, please let us know in comments and we’ll get back to you in the least time possible.
I recommend you to subscribe to our blog as PingZic will also be sharing some tips on using the Loopback adapter for some network diagnostics and other tests. Along with this, we have many other upcoming trending post in our Windows 10 section. Stay Tuned for More!


